Today I am going to attempt to take some PowerShell functions I wrote on Windows and run them on Linux. This should all be possible now that Microsoft Loves Linux! With the new .Net (core) going open-source and cross platform combined with AWS’s Tools for PowerShell core, I should be able to run the exact same functions across Windows and Linux.
For this exercise I will be using a Ubuntu virtual machine on Hyper-V but this could easily be done on CentOS or other various linux distros. Microsoft recently added support for installing PowerShell through popular distro’s default package managers so we will take that approach to get up and running.
Enough intro lets get to it! I am going to use Microsoft’s provided steps in a bash terminal window to register the Microsoft repo and get the latest PowerShell 6 alpha installed and running.
Installing PowerShell
|
1 2 3 4 5 6 7 8 9 10 11 12 13 14 |
# Import the public repository GPG keys curl https://packages.microsoft.com/keys/microsoft.asc | sudo apt-key add - # Register the Microsoft Ubuntu repository curl https://packages.microsoft.com/config/ubuntu/16.04/prod.list | sudo tee /etc/apt/sources.list.d/microsoft.list # Update apt-get sudo apt-get update # Install PowerShell sudo apt-get install -y powershell # Start PowerShell powershell |
After running those commands, PowerShell is installed and the system leaves us at the PowerShell command prompt.
To verify everything is working I can use $psversiontable to output our PowerShell info to the host.
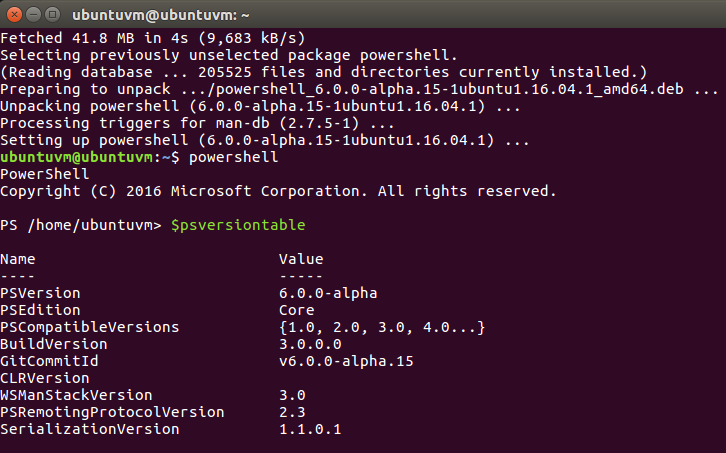
Okay, everything is looking good so far.
Loading AWS Tools for PowerShell Core
Next up is to get AWS Tools for PowerShell core loaded. This can be done with the new PowerShell package management cmdlets specifically Install-Module.
|
1 |
Install-Module -Name AWSPowerShell.NetCore |
Oh No, a red error appeared! Quick, email this error to our System Administrator to figure out what went wrong! Haha, just kidding. Lets read it.
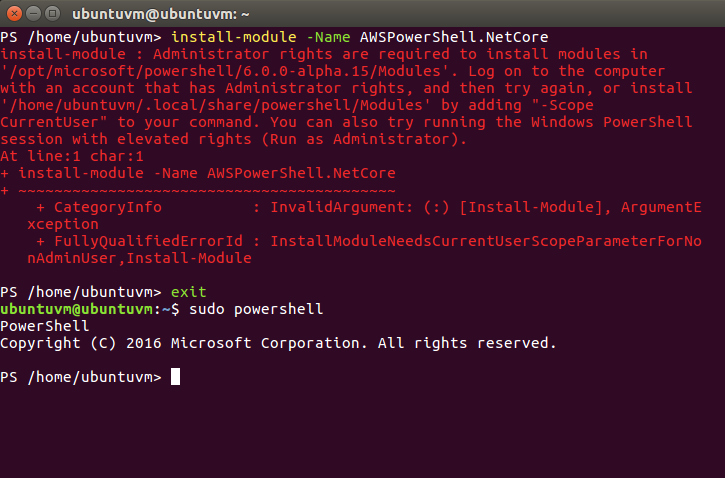
The error says administrator rights are required to install modules. The suggestions are to try to change the scope via parameter or to use elevated rights. Well, run as administrator sure won’t work on Linux, so I will do the equivalent and exit out of PowerShell then sudo powershell back into the PowerShell host.
After a retry of the Install-Module command from the now elevated PowerShell host, the Install-Module command completes without error.
I want to check to see the available modules with the get-module command and verify the AWSPowerShell.NetCore module is listed now that its installed.
|
1 |
Get-Module -listavilable |

Everything checks out and the AWS module is listed right at the top.
Loading my AWS functions from GitHub
I don’t plan on doing any editing of my functions or commits from this system, so I can skip configuring Git and just install it right from the package manager. The neat thing about using Git is that all the nuances that come from working on files between *nix and Windows, like different carriage returns, should be handled behind the scenes by Git.
|
1 |
sudo apt-get install git |
Once git is installed I can clone the PowerShellScripts repository from my github.
|
1 |
git clone https://github.com/Packet-Lost/PowerShellScripts |
A quick ls and cd is used to make sure the AWSFunctions folder came down with the repository.

Creating AWS Read Only Access Keys
Since this is just a proof of concept exercise, I am going to run a function I built to check the status of a running EC2 Instance by looking up its Name tag. The only access I need for this in AWS IAM is the ability to describe my instances so we can create a new IAM User with an attached EC2 Read only policy.
The IAM console has really become simple to use with recent updates but lets cover everything step by step.
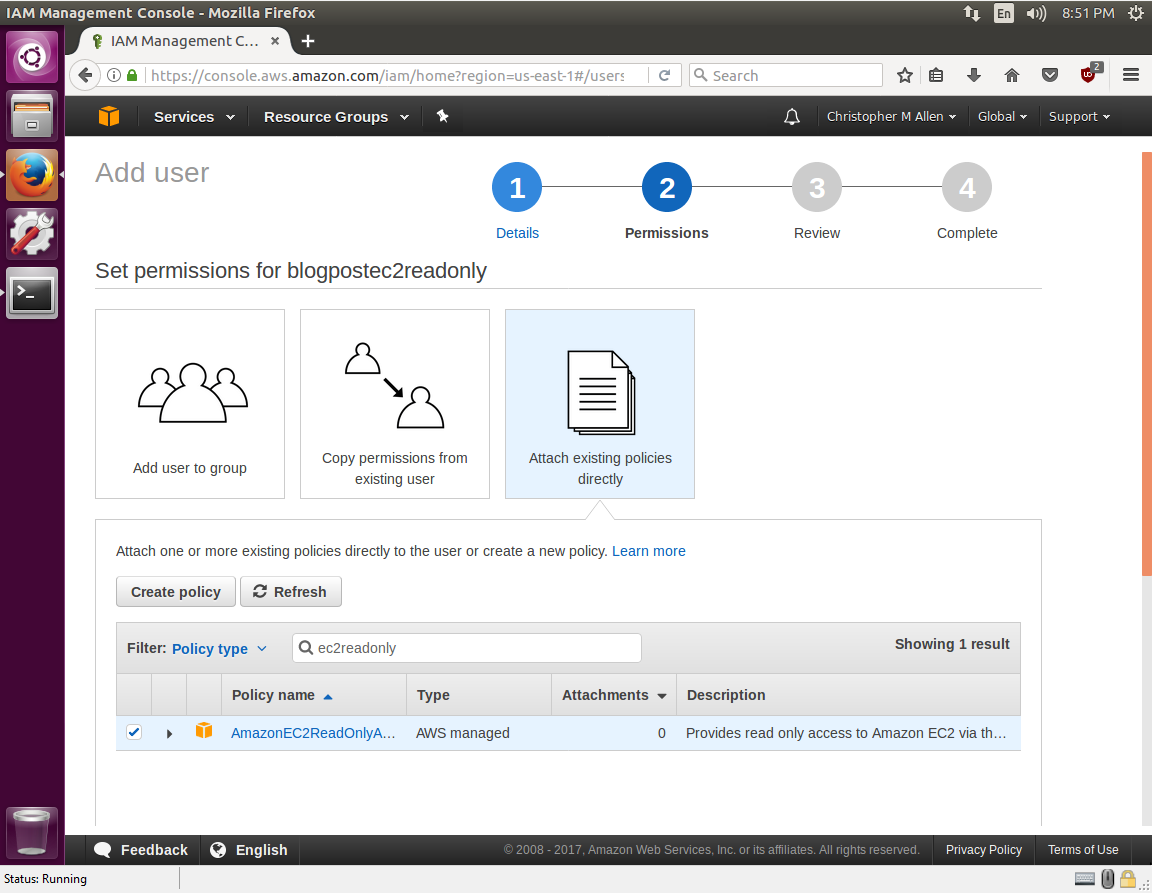
First I’ll log into my AWS account and navigate to the IAM console. From there I want to choose Users and then use the Add User button.

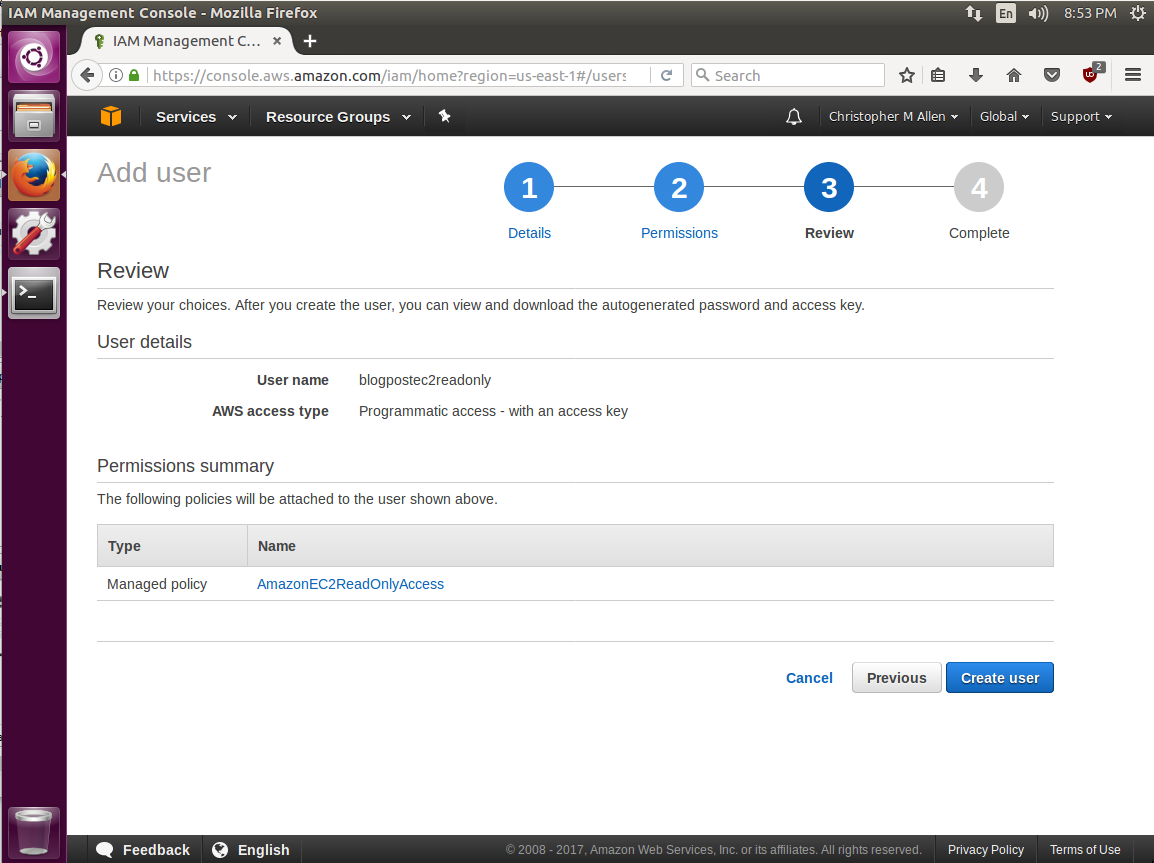
I will call the user blogpostec2readonly and check the box for programmatic access, which will generate our access keys.

On the next screen I will choose Attach existing policies directly. The filter box directly below can be used to search for “ec2readonly” and an AWS managed policy for EC2 Read Only will appear. This managed policy is prewritten json IAM policy maintained by Amazon that helps administrators quickly provide permissions without needing to deep dive into IAM permissions. Perfect for our use case at hand. I’ll check the box for this policy and click next.
The next screen is a review screen and a final Create User button.
After the new IAM user is created the access key and secret key are provided for download. Be careful with these, as AWS access keys are all that is needed to access an AWS account. I will copy the provided access keys into the gedit text editor so I can use them in the next step.
Configuring AWS PowerShell Module Credentials
All the prep work is nearly completed and the next steps are to configure the default region, access key, and secret keys to be used with the AWS PowerShell module cmdlets. To do this we will import the AWSPowerShell.NetCore module and run the Set-AWSCredentials and Initialize-AWSDefaults cmdlets.
|
1 2 3 |
Import-Module AWSPowerShell.NetCore Set-AWSCredentials -AccessKey {AKIAIOSFODNN7EXAMPLE} -SecretKey {wJalrXUtnFEMI/K7MDENG/bPxRfiCYEXAMPLEKEY} -StoreAs {default} Initialize-AWSDefaults -ProfileName default -Region us-east-1 |

Running my custom functions
I need to load my functions into memory so lets use Get-ChildItem to list the functions files and dot source each one. (% in PowerShell is a shorthand alias for ForEach-Object)
|
1 |
Get-ChildItem AWSFunctions | % { . $_.FullName } |
To verify my custom functions are loaded and ready to execute we can try to tab complete them. The function I am running in this exercise is Test-RunningEC2InstanceByServerName so I will type Test-Run and press tab.

Success! Tab completion filled out the name of function for me. Lets see if it works…
The Instance hosting this here blog is called PACKETLOST02 so I will send that server name in as a parameter into the function and I am expecting it to return that the instance is running.

The function ran and returned that the instance is running.
Summary
How neat was this? I took some PowerShell functions I wrote on the Windows platform and commited them into my GitHub repo then got them to run on Linux. When I initially wrote these functions it was to help automate my day to day administration of Amazon Web Services. I wrote these functions on the Windows platform with only the Windows platform in mind. Thanks to the great work of the developers at Microsoft and Amazon Web Services these functions are now cross platform.
I hope this post provides a quick glance into how useful and flexible PowerShell can be as well as how promising the future of the .NET core and the .NET standard libraries are to cloud computing. Cheers!