Getting Started with Source Control
I often see folks looking to get started with source control for their PowerShell scripts. There are a variety of free options out there but the choices get a bit limited when you need private repositories where code remains confidential. If you are like me a lot of your older code might be job specific, contain credentials, or perhaps you never even intend to share your code. None of those reasons are blockers for getting started using source control.
Here is a step by step walk through of using AWS CodeCommit and Git for Windows to make your first private Git Repo.
AWS CodeCommit
AWS CodeCommit is a service which provides fully managed, highly scalable source control and its currently free indefinitely for personal use if you stay under 50 GB stored, 5 user accounts, and 10,000 requests per month. Code is stored in AWS and automatically encrypted at rest. Think of it as private git repositories as a service.
There are a few methods which can be used to access CodeCommit. This guide will focus on HTTPS access with Git credentials instead of using IAM credentials directly. Using HTTPS leaves local Git able to interface with other Git repositories seamlessly.
Creating Your AWS CodeCommit Git Credentials
Assuming you already have an AWS account, navigate to the console and sign in. You can use that link to sign up for a new account and take advantage of AWS’ free tier if you are a new customer.
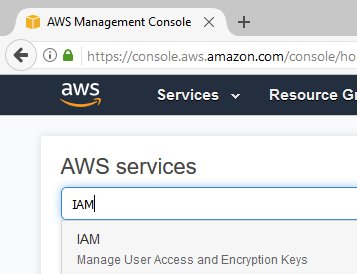
The first step after logging in is to create a new IAM user which will access the CodeCommit service. CodeCommit cannot be accessed over HTTPS from the root account. Head on over to the IAM console.
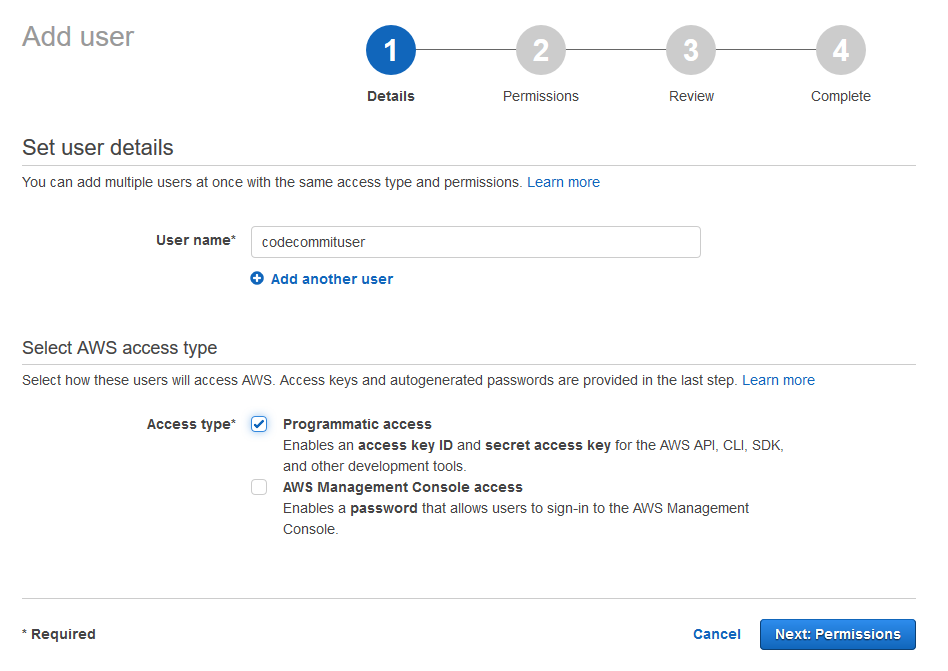
Within IAM create a new user. I’ll call this user codecommituser and check the box for Programmatic access.
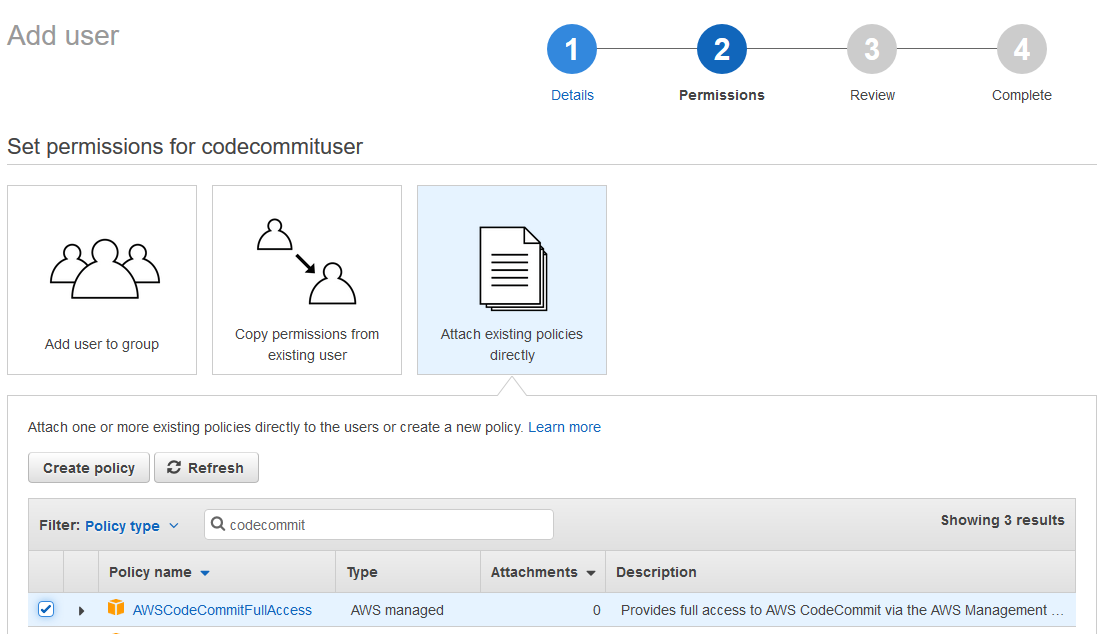
 On the permissions page choose “attach existing polices directly” and search for codecommit. I will choose AWSCodecommitFullAccess but another option would be the AWSCodeCommitPowerUser policy which restricts repository deletions.
At the end of the add user wizard IAM credentials are presented for this user. These credentials are not needed so go ahead and click close.
Back in the IAM console under the security credentials tab of the new user disable the IAM keys using the make inactive link.
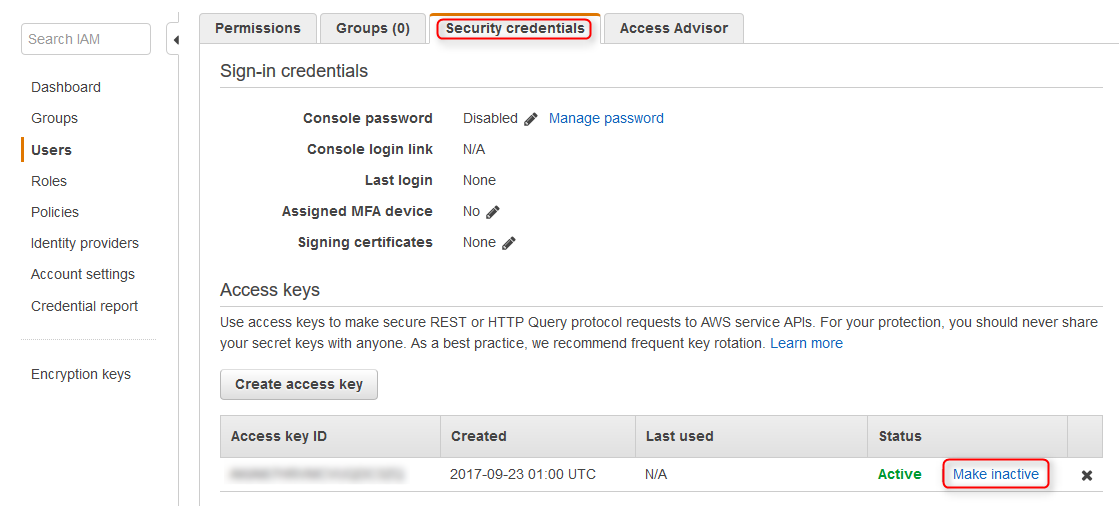 Further down on the security credentials page locate the HTTPS Git credentials section and use the Generate button. Credentials will be presented in a popup dialog. Save these credentials for later use.
Creating Your First CodeCommit Repository
Back in the AWS services console use the drop down in the top right of the screen to select the desired AWS region to use with CodeCommit. Then search for CodeCommit from the service search bar.
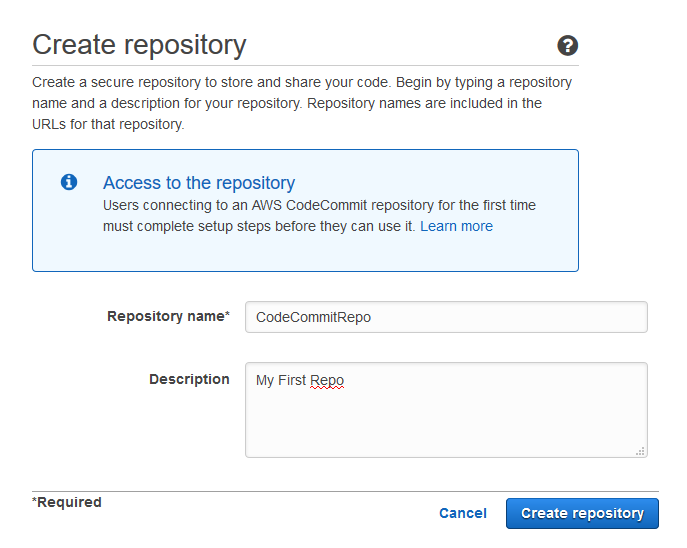
 Landing on the CodeCommit service page brings a Getting Started button, clicking the button starts the create repository process. I’ll go ahead and create a repository called CodeCommitRepo in this example.
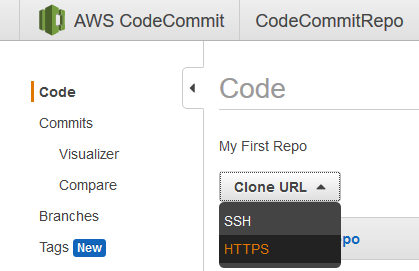
 Copy the link that is provided after choosing HTTPS from the Clone URL drop down. Save this link along side the previously saved Git HTTPS credentials.
Cloning a Repo And Making the First Commit
That was a lot of boring prep but now you should have everything you need to start using CodeCommit. If you don’t already have Git installed you will need it. Assuming you are on Windows download and install Git for Windows. The defaults of the installer are fine but make sure to double check the option to ensure the path environment variable will be updated to use Git.
With Git installed I create a new folder to keep the local clone of the new repository. Using PowerShell in this example I create a directory and cd (or set-location) into the new directory. From the new directory I then use “git clone” followed by the Repo url saved earlier.
|
1 2 3 |
mkdir CodeCommit cd CodeCommit git clone https://git-codecommit.us-east-1.amazonaws.com/v1/repos/CodeCommitRepo |
When Git tries to clone the directory it will prompt for the HTTPS Git credentials.
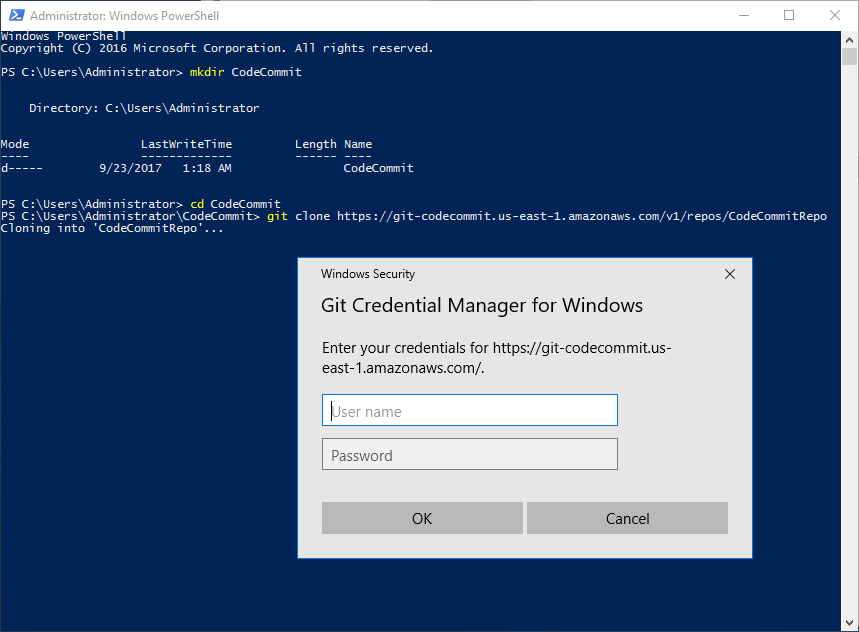 After entering the credentials Git clones the repo into a new sub-directory. If this is your first time using git set the email and name to attach to commits made to this repo. This can be done with git config within the sub-directory.
|
1 2 3 |
cd CodeCommitRepo git config user.email 'chris@example.com' git config user.name chris |
For this walk-through I will create a new script file with PowerShell but I could also copy existing scripts into the directory at this step. Creating a README.md here would also be useful.
Once the files I want stored in CodeCommit are in the cloned repo folder I am ready to start using source control! I use “git add .” to stage all the files in the directory for the next commit. Then “git commit” is used with the -m switch to add a message describing the changes. Finally “git push origin master” sends the commit up to AWS CodeCommit.
|
1 2 3 4 5 |
New-Item Get-HelloWorld.ps1 -type file -force -value "Write-Output 'Hello World'" git add . git commit -m 'my first commit' git push origin master |
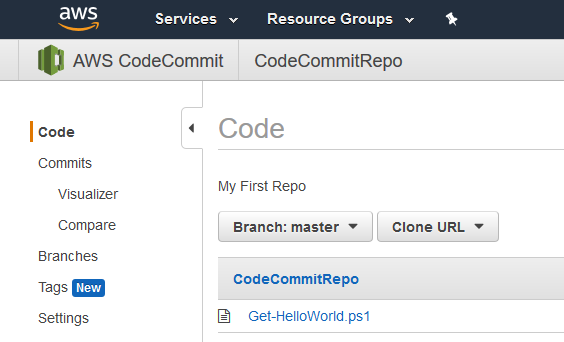
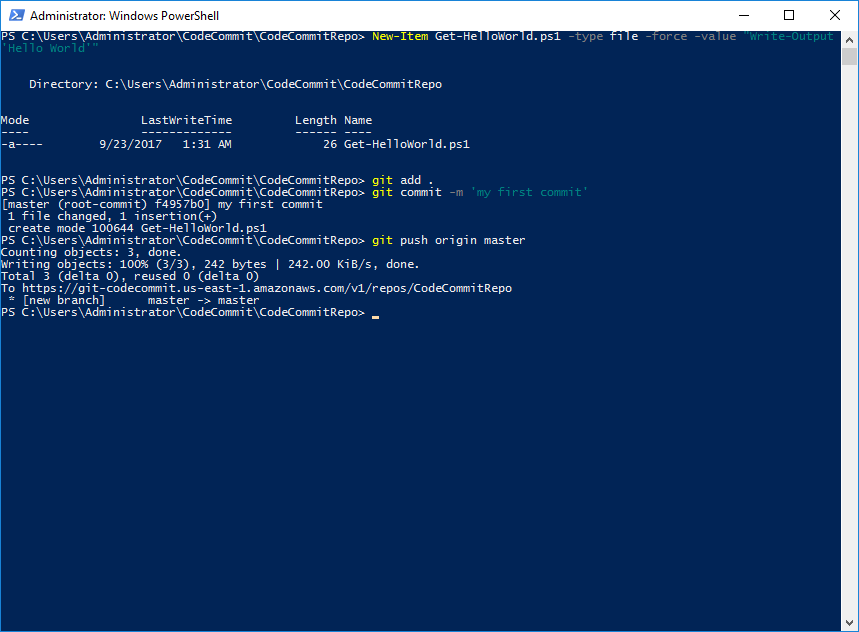 Back in the CodeCommit console will be the newly committed files.
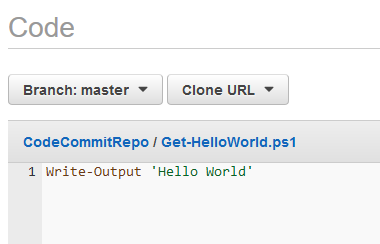
I can now view the contents of synchronized scripts from the console.
Using CodeCommit with Visual Studio Code
Maybe the command line isn’t how you want to work with Git. Its not for everyone. Visual Studio Code has great PowerShell and Git integration and it works smoothly with CodeCommit.
When working with PowerShell scripts in Visual Studio Code it will detect when it is working in a directory that is associated with a Git repo. Here is an example of what happens if I update my Hello World script file. I added some exclamation marks to the script and then saved the changes. The Source Control icon on the left hand side of Code lights up indicating it sees changed files. I can then use the + sign next to the file to stage my changes (git add equivalent).
 Then with files staged I can add a message and use the check box to commit (git commit -m equivalent).
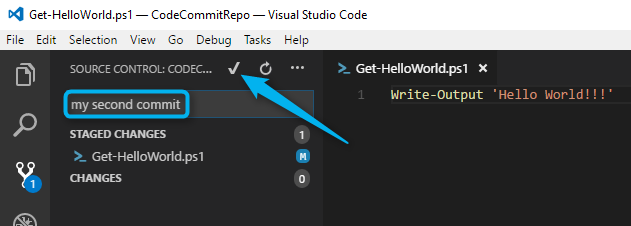 At the bottom of the Window is where I can synchronize changes up to AWS CodeCommit (git push equivalent).
A popup dialog appears for confirmation.
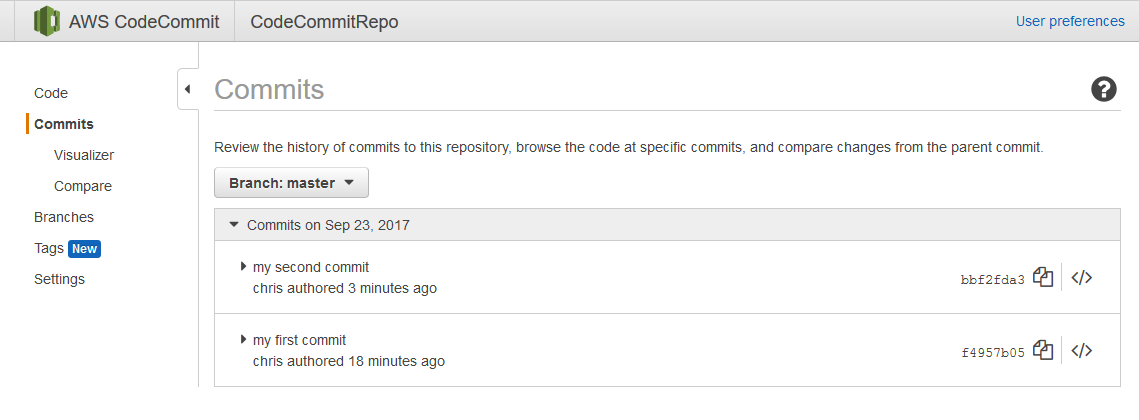
Now back in CodeCommit I can see the commit history and am able to track changes to my scripts.
Summary
In this walk through I created a new IAM user to use with AWS CodeCommit. The new IAM user is left with no access to AWS other then the CodeCommit service through HTTPS authentication. Using HTTPS authentication with CodeCommit enables encrypted file transmission and AWS handles encrypting the storage. Using this solution for source control I gain off site backups and versioning of all my scripts. Best of all its no cost to me provided I can stay under the CodeCommit Free Tier service limits.
Software referenced:



Have you tried providing access to only one resource i.e. one repo by using IAM credentials…?
I am facing problems when I try to give rights for a specific user on a specific repo only. CUrrently the user is able to clone all the repo, where I want to clone, Pull and Push only his assigned repo.
Any help?
Hi Aakash,
When creating the IAM policy for the user, give the user an IAM policy that provides codecommit:BatchGetRepositories and codecommit:ListRepositories to * as the resource and then give them codecommit:* to the resource arn of the specific repo. An example arn for a code commit repo is arn:aws:codecommit:us-west-2:111111111111:MyRepo. Just google for AWS CodeCommit Permissions Reference and you should end up at the AWS documentation to guide you.
Cheers,
Chris
Thanks for the blog, Its well written and helped me to start with AWScode commit.
Great blog, but the AWS GUI changes. Would be super interesting if every blog written by an expert or hobbyist would provide a CLI or PowerShell equivalent for executing all the actions.